Docker基本软件的安装
拉取镜像报错问题
Error response from daemon: Get “https://registry-1.docker.io/v2/”: net/http: request canceled while waiting for connection (Client.Timeout exceeded while awaiting headers)
如果出现以上问题则需要配置文件
更换国内镜像
vim /etc/docker/daemon.json
{
    "registry-mirrors": [
        "https://docker.m.daocloud.io/",
        "https://huecker.io/",
        "https://dockerhub.timeweb.cloud",
        "https://noohub.ru/",
        "https://dockerproxy.com",
        "https://docker.mirrors.ustc.edu.cn",
        "https://docker.nju.edu.cn",
        "https://xx4bwyg2.mirror.aliyuncs.com",
        "http://f1361db2.m.daocloud.io",
        "https://registry.docker-cn.com",
        "http://hub-mirror.c.163.com"
    ]
}
重启Docker即可
1.部署mysql
docker pull mysql:5.7
docker run -d -p 3306:3306 \
-e MYSQL_ROOT_PASSWORD=123456 \
-v /root/mysql5.7/conf:/etc/mysql/conf.d \
-v /root/mysql5.7/logs:/var/log/mysql \
-v /root/mysql5.7/data:/var/lib/mysql \
--name c1_mysql mysql:5.7
2.部署tomcat
docker pull tomcat:8.5
docker run -d -p 8081:8080 \
-v /root/tomcat/webapps:/usr/local/tomcat/webapps \
-v /root/tomcat/logs:/usr/local/tomcat/logs \
--name c_tomcat tomcat:8.5
try try:
/root/tomcat/webapps下创建test目录,并创建页面index.html
然后重启容器docker restart c_tomcat
浏览器输入地址访问index.html
3.部署nginx
docker pull nginx:1.21
宿主机创建vim /root/nginx/conf/nginx.conf
user  nginx;
worker_processes  1;

error_log  /var/log/nginx/error.log warn;
pid        /var/run/nginx.pid;


events {
    worker_connections  1024;
}


http {
    include       /etc/nginx/mime.types;
    default_type  application/octet-stream;

    log_format  main  '$remote_addr - $remote_user [$time_local] "$request" '
                      '$status $body_bytes_sent "$http_referer" '
                      '"$http_user_agent" "$http_x_forwarded_for"';

    access_log  /var/log/nginx/access.log  main;

    sendfile        on;
    #tcp_nopush     on;

    keepalive_timeout  65;

    #gzip  on;

    include /etc/nginx/conf.d/*.conf;
}
宿主机创建vim /root/nginx/conf.d/default.conf
server {
    listen       80;
    server_name  localhost;
    root   /usr/share/nginx/html;
    index  index.html index.htm;

    #charset koi8-r;
    #access_log  /var/log/nginx/host.access.log  main;

    location ~ /*/api/ {
    	proxy_pass http://localhost:8690;
    }

    #error_page  404              /404.html;

    # redirect server error pages to the static page /50x.html
    #
    error_page   500 502 503 504  /50x.html;
    location = /50x.html {
        root   /usr/share/nginx/html;
    }

    # proxy the PHP scripts to Apache listening on 127.0.0.1:80
    #
    #location ~ \.php$ {
    #    proxy_pass   http://127.0.0.1;
    #}

    # pass the PHP scripts to FastCGI server listening on 127.0.0.1:9000
    #
    #location ~ \.php$ {
    #    root           html;
    #    fastcgi_pass   127.0.0.1:9000;
    #    fastcgi_index  index.php;
    #    fastcgi_param  SCRIPT_FILENAME  /scripts$fastcgi_script_name;
    #    include        fastcgi_params;
    #}

    # deny access to .htaccess files, if Apache's document root
    # concurs with nginx's one
    #
    #location ~ /\.ht {
    #    deny  all;
    #}
}
运行容器
docker run  -d -p 80:80 \
--privileged=true \
-v /root/nginx/log:/var/log/nginx \
-v /root/nginx/conf.d:/etc/nginx/conf.d \
-v /root/nginx/conf/nginx.conf:/etc/nginx/nginx.conf \
-v /root/nginx/html:/usr/share/nginx/html \
--name c12_ngsssinsx nginx:1.21
4.部署nginx方法2
http://www.manongjc.com/detail/23-zukexcuusiczewg.html
上述可能会引发问题
1.首先下载nginx镜像
docker pull nginx
2.创建挂载的目录,我是放在/data/nginx里面,可自行更改
mkdir -p /data/nginx/conf #存放配置文件
mkdir -p /data/nginx/logs  #存放日志相关
mkdir -p /data/nginx/html  #存放html文件
mkdir -p /data/nginx/conf.d  #配置nginx访问
3.因为不能挂载文件,只能挂载一个文件夹,所以我们要先创建一个测试test容器的nginx,然后复制配置文件到挂载的目录上
##启动测试容器
docker run --name test -d nginx

##复制配置文件
# test:/etc/nginx/nginx.conf   /data/nginx/conf/
# 启动的容器名 nginx的文件位置    linux 自定义目录的位置
docker cp test:/etc/nginx/nginx.conf /data/nginx/conf/
docker cp test:/etc/nginx/conf.d/default.conf  /data/nginx/conf.d

##如果不知道配置文件在docker里面的目录位置,可以进去看一下
docker exec -it test /bin/bash
4.然后运行你自己的nginx
docker run --name nginx01 --privileged -it -p 80:80 -v /data/nginx/conf/nginx.conf:/etc/nginx/nginx.conf:ro -v /data/nginx/conf.d:/etc/nginx/conf.d:ro -v /data/nginx/html:/usr/share/nginx/html:rw -v/data/nginx/logs:/var/log/nginx -d nginx
5.最后把我们的放到html文件夹解压,重启nginx即可
##在html文件夹解压我们上传的dist文件
unzip dist.zip

##重启Jenkins
docker restart b0ba
6.最后就去访问我们的ip和端口,试试看,也可以在本机测试是否成功
curl ip:port
4.部署redis
docker run -d -p 6379:6379 --name c_redis redis:6
5.部署ElasticSearch
- 先创建/root/elasticsearch/config/elasticsearch.yml
# ======================== Elasticsearch Configuration =========================
#
# NOTE: Elasticsearch comes with reasonable defaults for most settings.
#       Before you set out to tweak and tune the configuration, make sure you
#       understand what are you trying to accomplish and the consequences.
#
# The primary way of configuring a node is via this file. This template lists
# the most important settings you may want to configure for a production cluster.
#
# Please consult the documentation for further information on configuration options:
# https://www.elastic.co/guide/en/elasticsearch/reference/index.html
#
# ---------------------------------- Cluster -----------------------------------
#
# Use a descriptive name for your cluster:
#
#cluster.name: my-application
#
# ------------------------------------ Node ------------------------------------
#
# Use a descriptive name for the node:
#
#node.name: node-1
#
# Add custom attributes to the node:
#
#node.attr.rack: r1
#
# ----------------------------------- Paths ------------------------------------
#
# Path to directory where to store the data (separate multiple locations by comma):
#
#path.data: /path/to/data
#
# Path to log files:
#
#path.logs: /path/to/logs
#
# ----------------------------------- Memory -----------------------------------
#
# Lock the memory on startup:
#
#bootstrap.memory_lock: true
#
# Make sure that the heap size is set to about half the memory available
# on the system and that the owner of the process is allowed to use this
# limit.
#
# Elasticsearch performs poorly when the system is swapping the memory.
#
# ---------------------------------- Network -----------------------------------
#
# Set the bind address to a specific IP (IPv4 or IPv6):
#
network.host: 0.0.0.0
#
# Set a custom port for HTTP:
#
#http.port: 9200
#
# For more information, consult the network module documentation.
#
# --------------------------------- Discovery ----------------------------------
#
# Pass an initial list of hosts to perform discovery when this node is started:
# The default list of hosts is ["127.0.0.1", "[::1]"]
#
#discovery.seed_hosts: ["host1", "host2"]
#
# Bootstrap the cluster using an initial set of master-eligible nodes:
#
#cluster.initial_master_nodes: ["node-1", "node-2"]
#
# For more information, consult the discovery and cluster formation module documentation.
#
# ---------------------------------- Gateway -----------------------------------
#
# Block initial recovery after a full cluster restart until N nodes are started:
#
#gateway.recover_after_nodes: 3
#
# For more information, consult the gateway module documentation.
#
# ---------------------------------- Various -----------------------------------
#
# Require explicit names when deleting indices:
#
#action.destructive_requires_name: true
http.cors.enabled: true
http.cors.allow-origin: "*"
- 运行容器
docker run -d \
-v /root/elasticsearch/config/elasticsearch.yml:/usr/share/elasticsearch/config/elasticsearch.yml \
-v /root/elasticsearch/data:/usr/share/elasticsearch/data \
-v /root/elasticsearch/plugins:/usr/share/elasticsearch/plugins \
-e ES_JAVA_OPTS="-Xms512m -Xmx512m" \
-e "discovery.type=single-node" \
-p 9200:9200 \
-p 9300:9300 \
--net=host \
--name c_elasticsearch elasticsearch:7.3.1
java.nio.file.AccessDeniedException: /usr/share/elasticsearch/data/nodes"
宿主机上的/root/elasticsearch/config目录权限不足导致的
chmod 777 /root/elasticsearch/data
问题描述:
宿主机不能访问容器中es
原因分析:
因为docker的虚拟ip网段是172.17.*,与局域网的ip网段不同,无法进行通信,即访问不到资源
在docker 创建和启动容器时加上 --net=host 指令,表示容器与宿主机共享同一个网卡,可以解决网段不一致的问题。
配置文件 elasticsearch.yml
network.host: 0.0.0.0
- 安装ik分词器,只要将解压后的ik分词器复制到/root/elasticsearch/plugins 目录下,重启docker容器
6.部署rabbitmq
拉取镜像
docker pull rabbitmq:3.7.14
安装运行容器
docker run -d -p 5672:5672 -p 15672:15672 \
-v /root/rabbitmq/data:/var/lib/rabbitmq \
--name c_rabbitmq rabbitmq:3.7.14
启动rabbitmq_management
docker exec -it c_rabbitmq rabbitmq-plugins enable rabbitmq_management
7.部署nocas
#拉取
docker pull nacos/nacos-server:2.0.3
#创建目录
mkdir -p /root/nacos/init.d /root/nacos/logs
#在init.d下新建文件 custom.properties
#management.endpoints.web.exposure.include=*
docker run -d  -p 8848:8848 -p 9848:9848 -p 9849:9849 \
-e JVM_XMS=256m -e JVM_XMX=256m --env MODE=standalone \
-v /root/nacos/init.d/custom.properties:/home/nacos/init.d/custom.properties \
-v /root/nacos/logs:/home/nacos/logs \
--name c_nacos nacos/nacos-server:2.0.3

docker run -e JVM_XMS=256m -e JVM_XMX=256m --env MODE=standalone --name nacos -d -p 8848:8848 nacos/nacos-server
需要打开三个端口8848 、9848 、 9849
win11安装 Docker Desktop
启用WSL
dism.exe /online /enable-feature /featurename:Microsoft-Windows-Subsystem-Linux /all /norestart
安装命令
**在当前目录打开cmd **
Desktop4.24.1.0.exe 下载的Desktop4.24.1.0.exe软件
D:\Program Files\Docker 安装的指定的目录
"Desktop4.24.1.0.exe" install --backend=wsl-2 --installation-dir=D:\ruanjian\docker --wsl-default-data-root=D:\Program Files\Docker\wsl --accept-license
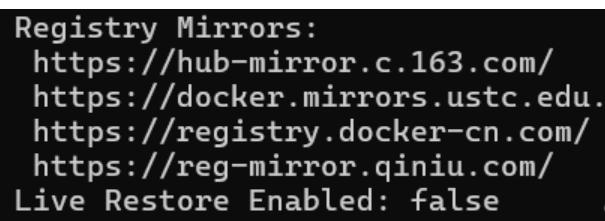
安装成功后配置文件
{
  "registry-mirrors": [
    "https://82m9ar63.mirror.aliyuncs.com",
    "https://mirror.ccs.tencentyun.com"
  ]
}
cmd输入:docker info
docker启动mysql:用户名是root