Spring Cloud Config 分布式配置
Config 基本介绍
概述
分布式系统面临的--配置文件的问题
微服务意味着要将单体应用中的业务拆分成一个个子服务,每个服务的粒度相对较小,因此系统中会出现大量的服务,由于每个服务都需要必要的配置信息才能运行,所以一套集中式的,动态的配置管理设施是必不可少的。SpringCloud提供了ConfigServer来解决这个问题,我们每一个微服务自己带着一个application.yml,那上百的的配置文件要修改起来,岂不是要发疯!
什么是springCloud Config配置中心
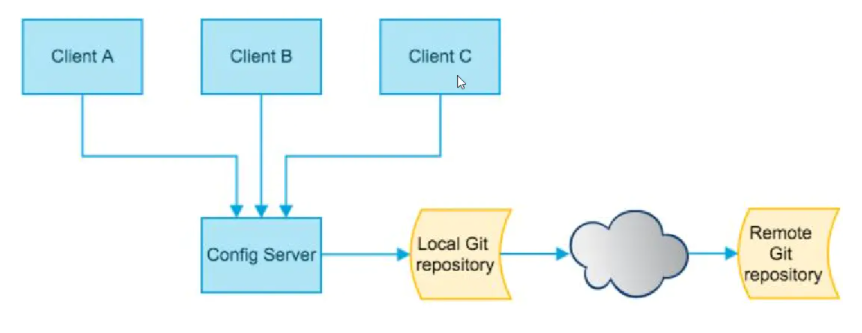
什么是springcloud config
springcloud config 为微服务架构中的微服务提供集中化的外部配置支持,配置服务器为各个不同微服务应用的所有环境提供了一个中心化的外部配置。
怎么玩
springcloud config 分为服务端和客户端两部分
服务端也称为分布式配置中心,它是一个独立的微服务应用,用来连接配置服务器并为客户端提供获取配置信息,加密/解密信息等访问接口。
客户端则是通过指定的配置中心来管理应用资源,以及与业务相关的配置内容,并在启动的时候来配置中心获取和加载配置信息。配置服务器默认采用git来存储配置信息,这样就有助于对环境配置进行版本管理,并且可以通过git客户端工具来方便地管理和访问配置内容。
功能
集中管理配置文件。
不同环境不同配置,动态化的配置更新,分环境部署比如dev/test/prod/beta/relase。
运行期间动态调整配置,不再需要在每个服务部署的机器上编写配置文件,服务会向配置中心统一拉取配置的信息。
当配置发生变动时,服务不再需要重启即可感知到配置的变化并应用新的配置。
将配置信息以REST接口的形式暴露。
git环境配置
码云官网:https://gitee.com/
1,注册码云,新建仓库
2,删除C:\Users\111.ssh公钥
3,在git输入ssh-keygen -t rsa -C "2121007706@qq.com" 生成公钥
4,复制id_rsa.pub生成的公钥到码云SSH公钥时,输入邮箱账户即可
5,设置用户名:git config --global user.name "用户名"
6,设置邮箱:git config --global user.email "邮箱"
7,进入指定文件夹右键打开git: git clone 需要克隆下载的ssh地址
- 在springcloud目录下新建一个application.yml
spring:
  profiles:
    active: dev

---
spring:
  profiles: dev
  application:
     name: springcloud-config-dev

---
spring:
  profiles: test
  application:
    name: springcloud-config-test
9,进入主分支:cd springcloud-cnfig
10,准备提交:git add .
11,查看状态:git status .
12,像码云仓库设置提交状态:git commit -m "first commit"
13,提交:git push origin master
服务端连接Git
新建springcloud-config-server-3344模块导入pom.xml依赖
   <dependencies>
         <!--服务端config-->
         <dependency>
             <groupId>org.springframework.cloud</groupId>
             <artifactId>spring-cloud-config-server</artifactId>
             <version>2.2.8.RELEASE</version>
         </dependency>
         <!--完善监控信息-->
         <dependency>
             <groupId>org.springframework.boot</groupId>
             <artifactId>spring-boot-starter-actuator</artifactId>
             <version>2.2.9.RELEASE</version>
         </dependency>
         <!--spring-boot启动器-->
         <dependency>
             <groupId>org.springframework.boot</groupId>
             <artifactId>spring-boot-starter-web</artifactId>
         </dependency>
     </dependencies>
resource下创建application.yml配置文件,Spring Cloud Config服务器从git存储库(必须提供)为远程客户端提供配置:
server:
  port: 3344
spring:
  application:
    name: spring-config-server
    # 连接码云远程仓库
  cloud:
    config:
      server:
        git:
          uri: https://gitee.com/yuanyuan1111/spriingcloud-config.git #克隆下载选择https
主启动类
package com.springcloud;
import org.springframework.boot.SpringApplication;
import org.springframework.boot.autoconfigure.SpringBootApplication;
import org.springframework.cloud.config.server.EnableConfigServer;
//远程服务端
@SpringBootApplication
@EnableConfigServer // 开启spring cloud config server服务
public class Config_server_3344 {
    public static void main(String[] args) {
        SpringApplication.run(Config_server_3344.class,args);
    }
}
HTTP服务具有以下格式的资源:
/{application}/{profile}[/{label}]
/{application}-{profile}.yml
/{label}/{application}-{profile}.yml
/{application}-{profile}.properties
/{label}/{application}-{profile}.properties
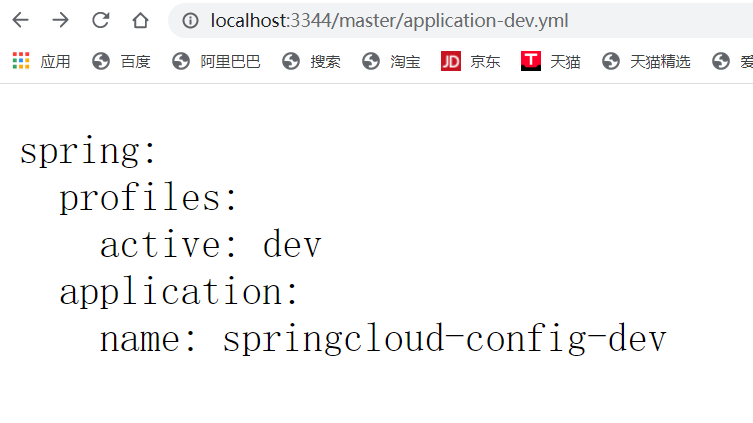
测试访问 http://localhost:3344/master/application-dev.yml 或者:http://localhost:3344/application-dev.yml
访问结果
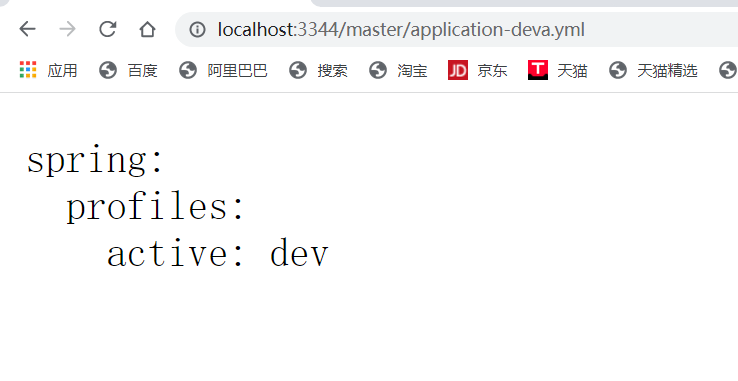
**如果访问不存在的页面:**http://localhost:3344/master/application-deva.yml
客户端连接服务端
在Git目录下新建config-client.yml
spring:
  profiles:
    active: dev

---
server:
  port: 8201
#spring 配置
spring:
  profiles: dev
  application:
    name: springcloud-provider-dept #项目的模块起名字

# Eureka配置:配置服务注册中心地址
eureka:
  client:
    service-url:
      defaultZone: http://eureka7001.com:7001/eureka/,http://eureka7002.com:7002/eureka/,http://eureka7003.com:7003/eureka/

---
server:
  port: 8202
#spring 配置
spring:
  profiles: test
  application:
    name: springcloud-provider-dept #项目的模块起名字

# Eureka配置:配置服务注册中心地址
eureka:
  client:
    service-url:
      defaultZone: http://eureka7001.com:7001/eureka/,http://eureka7002.com:7002/eureka/,http://eureka7003.com:7003/eureka/
右键git提交到码云仓库中
输入命令
准备提交:git add .
查看状态:git status .
像码云仓库设置提交状态:git commit -m "2 commit"
提交:git push origin master
新建springcloud-config-client-3355模块
导入依赖
 <dependencies>
         <!--客户端config-->
         <dependency>
             <groupId>org.springframework.cloud</groupId>
             <artifactId>spring-cloud-starter-config</artifactId>
             <version>2.2.8.RELEASE</version>
         </dependency>
         <!--完善监控信息-->
         <dependency>
             <groupId>org.springframework.boot</groupId>
             <artifactId>spring-boot-starter-actuator</artifactId>
         </dependency>
         <!--spring-boot启动器-->
         <dependency>
             <groupId>org.springframework.boot</groupId>
             <artifactId>spring-boot-starter-web</artifactId>
         </dependency>
     </dependencies>
bootstrap.yml
#bootstrap是系统级别的而application是用户级别的 两者bootstrap的级别高
spring:
  cloud:
    config:
      name: config-client #仓库中的文件名称
      profile: dev #属于哪个环境
      label: master #属于哪个分支
      uri: http://localhost:3344  #访问服务端的路径
application.yml
#用户级别的
spring:
  application:
    name: springcloud-config-client-3355
创建controller包下的ConfigClientController.java 用于测试
package com.springcloud.controller;
import org.springframework.beans.factory.annotation.Value;
import org.springframework.web.bind.annotation.RequestMapping;
import org.springframework.web.bind.annotation.RestController;
/**
 * 获取远程服务的消息
 */
@RestController
public class ConfigclientController {
    /**
     * //获取Eureka服务
     */
    @Value("${spring.application.name}")
    private String applicationName;
    /**
     * 获取Eureka服务
     */
    @Value("${eureka.client.service-url.defaultZone}")
    private String eurekaServer;
    /**
     * 获取服务端的端口号
     */
    @Value("${server.port}")
    private String port;
    @RequestMapping("/config")
    public  String getConfigClient(){
        return "applicationName"+applicationName
                +"eurekaServer"+eurekaServer
                +"port"+port;
    }
}
启动类:ConfigClicent_3355
package com.springcloud;
import org.springframework.boot.SpringApplication;
import org.springframework.boot.autoconfigure.SpringBootApplication;
//远程服务客户端
@SpringBootApplication
public class ConfigClicent_3355 {
    public static void main(String[] args) {
        SpringApplication.run(ConfigClicent_3355.class,args);
    }
}
浏览器输入:http://localhost:3344/master/config-client-dev.yml 测试服务端是否连接

访问:http://localhost:8201/config 是否连接上客户端
远程服务配置
本地新建config-dept.yml和config-eureka.yml并提交到码云仓库
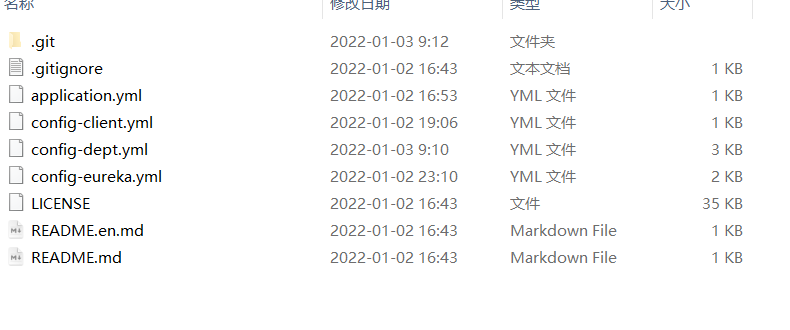
config-dept.yml
spring:
  profiles:
    active: dev

---

server:
  port: 8081
#mybatis配置
mybatis:
  type-aliases-package: com.springcloud.pojo
  config-location: classpath:mybatis/mybatis-config.xml
  mapper-locations: classpath:mybatis/mapper/*.xml

#spring 配置
spring:
  profiles: dev
  application:
    name: springcloud-provider-dept #项目的模块起名字
  datasource:
    url: jdbc:mysql://localhost:3306/db01?characterEncoding=utf8&useSSL=false&serverTimezone=UTC&allowPublicKeyRetrieval=true
    type: com.alibaba.druid.pool.DruidDataSource
    driver-class-name: com.mysql.cj.jdbc.Driver
    username: root
    password: root

# Eureka配置:配置服务注册中心地址
eureka:
  client:
    service-url:
      defaultZone: http://eureka7001.com:7001/eureka/,http://eureka7002.com:7002/eureka/,http://eureka7003.com:7003/eureka/
  instance:
    instance-id: springcloud-provider-depet8001  #修改Eureka得默认描述信息

#info配置
info:
  app.name: yuan-springcloud
  company.name: yuan.com

---

server:
  port: 8081
#mybatis配置
mybatis:
  type-aliases-package: com.springcloud.pojo
  config-location: classpath:mybatis/mybatis-config.xml
  mapper-locations: classpath:mybatis/mapper/*.xml

#spring 配置
spring:
  profiles: dev
  application:
    name: springcloud-provider-dept #项目的模块起名字
  datasource:
    url: jdbc:mysql://localhost:3306/db02?characterEncoding=utf8&useSSL=false&serverTimezone=UTC&allowPublicKeyRetrieval=true
    type: com.alibaba.druid.pool.DruidDataSource
    driver-class-name: com.mysql.cj.jdbc.Driver
    username: root
    password: root

# Eureka配置:配置服务注册中心地址
eureka:
  client:
    service-url:
      defaultZone: http://eureka7001.com:7001/eureka/,http://eureka7002.com:7002/eureka/,http://eureka7003.com:7003/eureka/
  instance:
    instance-id: springcloud-provider-depet8001  #修改Eureka得默认描述信息

#info配置
info:
  app.name: yuan-springcloud
  company.name: yuan.com
config-eureka.yml
spring:
  profiles:
    active: dev

---

server:
  port: 7001

#spring 配置
spring:
  profiles: dev
  application:
    name: springcloud-config-eureka #项目的模块起名字

# Eureka配置
eureka:
  instance:
    hostname: eureka7001.com # Eureka服务端的实例名字
  client:
    register-with-eureka: false # 表示是否向 Eureka 注册中心注册自己(这个模块本身是服务器,所以不需要)
    fetch-registry: false # fetch-registry如果为false,则表示自己为注册中心
    service-url: # 监控页面~
      #单击:Eureka的默认端口以及访问路径 --->http://localhost:7001/eureka/
      # 集群(关联):7001关联7002、7003
      defaultZone: http://eureka7002.com:7002/eureka/,http://eureka7003.com:7003/eureka/

---
server:
  port: 7001

#spring 配置
spring:
  profiles: test
  application:
    name: springcloud-config-eureka #项目的模块起名字

# Eureka配置
eureka:
  instance:
    hostname: eureka7001.com # Eureka服务端的实例名字
  client:
    register-with-eureka: false # 表示是否向 Eureka 注册中心注册自己(这个模块本身是服务器,所以不需要)
    fetch-registry: false # fetch-registry如果为false,则表示自己为注册中心
    service-url: # 监控页面~
      #单击:Eureka的默认端口以及访问路径 --->http://localhost:7001/eureka/
      # 集群(关联):7001关联7002、7003
      defaultZone: http://eureka7002.com:7002/eureka/,http://eureka7003.com:7003/eureka/
新建springcloud-config-eureka-7001模块,并将原来的springcloud-eureka-7001模块下的内容拷贝的该模块。
导入依赖
        <!--客户端config-->
        <dependency>
            <groupId>org.springframework.cloud</groupId>
            <artifactId>spring-cloud-starter-config</artifactId>
            <version>2.2.8.RELEASE</version>
        </dependency>
- 清空该模块的application.yml配置,并新建bootstrap.yml连接远程配置
bootstrap.yml
spring:
  cloud:
    config:
      label: master  #属于哪个分支
      name: config-eureka #仓库中文件的名称
      uri: http://localhost:3344  #访问服务端的路径
      profile: dev #属于哪个环境
application.yml
spring:
  application:
    name: springcloud-config-eureka-7001
测试
第一步:启动 Config_Server_3344,并访问 http://localhost:3344/master/config-eureka-dev.yml 测试
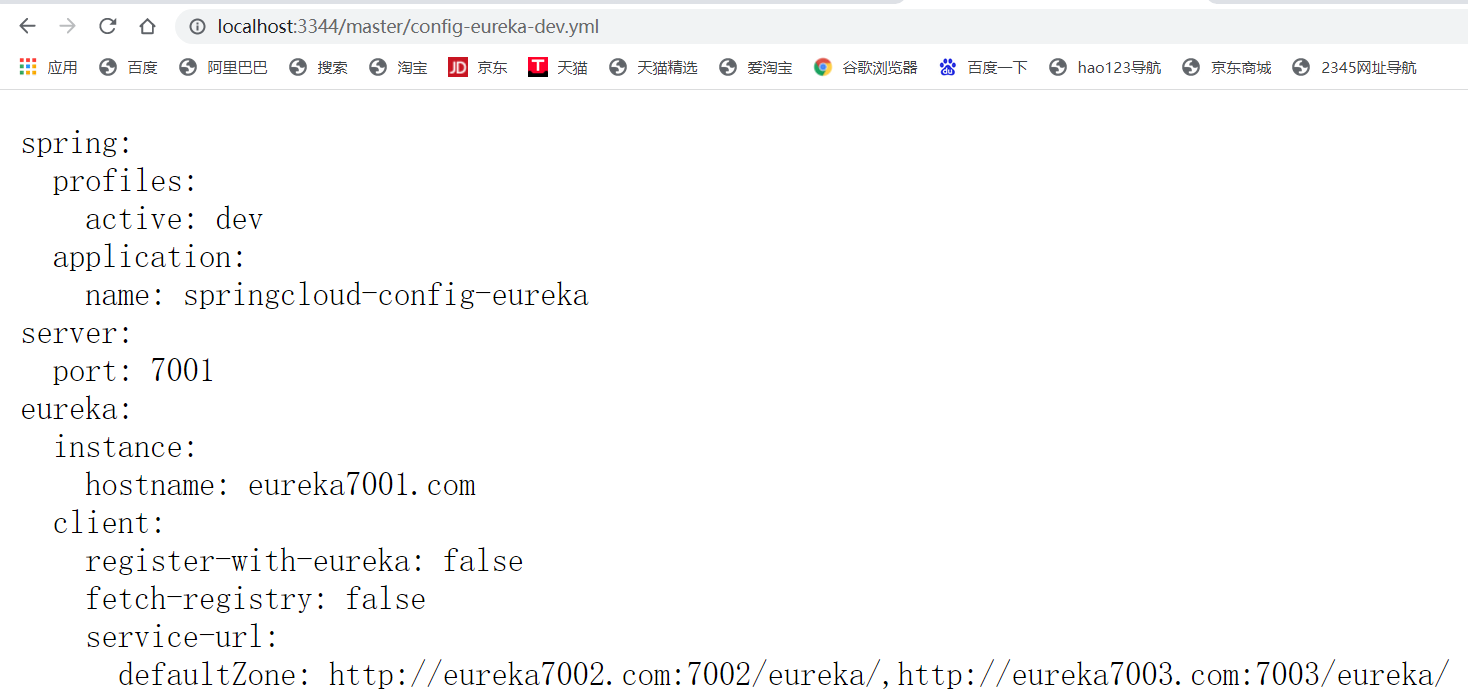
第二步:启动ConfigEurekaServer_7001,访问 http://localhost:7001/ 测试
新建springcloud-config-dept-8001模块并拷贝springcloud-provider-dept-hystrix-8001的内容
同理导入spring cloud config依赖、清空application.yml 、新建bootstrap.yml配置文件并配置
spring:
  cloud:
    config:
      name: config-dept #仓库中的文件名称
      profile: dev #属于哪个环境
      label: master #属于哪个分支
      uri: http://localhost:3344  #访问服务端的路径
application.yml
spring:
  application:
    name: springcloud-config-dept-8001
导入依赖
        <!--客户端config-->
        <dependency>
            <groupId>org.springframework.cloud</groupId>
            <artifactId>spring-cloud-starter-config</artifactId>
            <version>2.2.8.RELEASE</version>
        </dependency>
第一步:启动 Config_Server_3344,并访问 http://localhost:3344/master/config-dept-dev.yml 测试
第二步:启动DeptProvider_8001,访问:http://localhost:8081/dept/allDepet测试